前言
简单来讲云原生实践三步走:
上K8s容器化 、上servicemesh服务网格化、上Serverless无服器化。
什么是Serverless?价值在哪?为什么需要Serverless?
What
Serverless是什么?
Serverless直接翻译与理解就是“无服务器”。
那问题就来了,没有服务器,是不是就没有后端,那请求如何响应呢?
是不是觉得不可思议?
我们在理解一个事情的时候的直观感觉就是如果一个道理讲不清楚,经常会怀疑是不是在营造一个新的概念。毕竟现在太多的新名词。
其实从现象来看,当没有请求访问时,确实没有后端实例。但是当请求进来后,会快速拉起后端进行响应。如果请求流量过大,还会快速来扩容。如果请求降下来了,后端也会自动缩容。
这就是无服务器的本质,最大的商业价值,从老板角度是降本增效;从使用者即客户角度,就是可以实现按流量QPS付费,特别适合创业初期,没有服务器,但是想快速搭建出在线的服务的场景。
开源社区从Start上对比,openfaas比Knative高出一个数量级。openfaas可以部署到容器、k8s和虚机 2016年开源。文档没有knative好。此次我们针对Openfaas做一次实战。
环境搭建
本次环境搭建,用的是
centos7.8 k3s openfaas helm
# 安装k3s
curl -sfL https://get.k3s.io | sh -
# Check for Ready node, takes ~30 seconds
sudo k3s kubectl get node

# 安装 faas-cli
curl -sSL https://cli.openfaas.com | sudo -E sh
#  标志 `-E` 允许将任何 `http_proxy` 环境变量传递到安装 bash 脚本。

# 安装
# 安装helm
curl -sSLf https://raw.githubusercontent.com/helm/helm/master/scripts/get-helm-3 | bash
#
kubectl apply -f https://raw.githubusercontent.com/openfaas/faas-netes/master/namespaces.yml
helm repo add openfaas https://openfaas.github.io/faas-netes/

# 由于是使用k3s,因此直接使用helm会报错,因此需要创建k8s的kubeconfig文件
cp /etc/rancher/k3s/k3s.yaml $HOME/.kube/config

helm repo update \
 && helm upgrade openfaas \
  --install openfaas/openfaas \
  --namespace openfaas

PASSWORD=$(kubectl -n openfaas get secret basic-auth -o jsonpath="{.data.basic-auth-password}" | base64 --decode) && \
echo "OpenFaaS admin password: $PASSWORD"

OpenFaaS admin password: Oo8S3RXTu61k
openfaas构建
faas-cli build # 构建docker镜像
faas-cli push # 推送镜像
faas-cli deploy # 部署到k8s
faas-cli up # 一条命令等于上述三个命令的集合
模版
faas-cli template pull # 从官方github拉openfaas语言模版
faas-cli template store list # 模版商店查看有哪些模版
faas-cli template store pull go # 拉取go模版到本地
faas-cli template store pull openfaas/go # 也可以指定仓库
faas-cli template store describe go # 查看详细信息
实战:创建一个go的faas函数
# 拉取go模版,这个代码来源于 openFaas作者的书《everyday golang》中的案例
# 执行完后,会在本地生成一个tempalate目录,存放所有的模版,其中包含我们将要用的golang-middleware
faas-cli template store pull golang-middleware
# 创建新函数
faas-cli new --lang golang-middleware echo

# 执行完后,生成对应的项目目录和配置文件:
[root@VM-0-12-centos ~]# ls
echo  echo.yml  template

[root@VM-0-12-centos ~]# tree echo
echo
├── go.mod
└── handler.go
至此已经生成了云函数,查看函数内容:
// 查看handler.go
package function

import (
        "fmt"
        "io"
        "net/http"
)

func Handle(w http.ResponseWriter, r *http.Request) {
        var input []byte

        if r.Body != nil {
                defer r.Body.Close()

                body, _ := io.ReadAll(r.Body)

                input = body
        }

        w.WriteHeader(http.StatusOK)
        w.Write([]byte(fmt.Sprintf("Body: %s", string(input))))
}
可以看到非常简单,不需要写server监听器相关的代码,只用关注自己业务逻辑的API函数即可。
这个函数非常简单,如果要加其他依赖、静态文件或是数据库,可以自行修改。
云函数也支持其他语言如:java node 等其他语言。具体参考 https://docs.openfaas.com/languages/go/
代码写完之后,需要打包成docker镜像并部署
# faas-cli up  -f echo.yml --skip-push
...
cc2447e1835a: Layer already exists
latest: digest: sha256:e30cae5f7963efc158d2cac8848bf49f27d3105013ebd65bda772586f26380a1 size: 1780
[0] < Pushing echo [zackzhangkai/openfaas-echo:latest] done.
[0] Worker done.
Deploying: echo.

Deployed. 202 Accepted.
URL: http://localhost:31112/function/echo
此时会报错需要Login,我们获取paasword及login
faas-cli login  # 用户名admin,密码 部署的时候有提示,也可以通过cm查询

PASSWORD=$(kubectl -n openfaas get secret basic-auth -o jsonpath="{.data.basic-auth-password}" | base64 --decode) && \
echo "OpenFaaS admin password: $PASSWORD"
[root@VM-0-12-centos ~]# kubectl -n openfaas get svc |grep gateway
gateway            ClusterIP   10.43.48.91     <none>        8080/TCP         4h41m
gateway-external   NodePort    10.43.61.133    <none>        8080:31112/TCP   4h41m
faas-cli login --gateway localhost:31112
可以看到函数已经部署出来了一个实例
[root@VM-0-12-centos ~]# kubectl get po -A | grep echo
openfaas-fn   echo-6459c9b577-wpx96                     1/1     Running     0               54s
[root@VM-0-12-centos ~]#
openfaas管控页面
openfaas自带管控页面,需要通过gateway查看登陆地址:
# kubectl get svc -A |grep gateway
openfaas      gateway                 ClusterIP      10.43.48.91     <none>        8080/TCP                     12d
openfaas      gateway-external        NodePort       10.43.61.133    <none>        8080:31112/TCP               12d
把svc暴露为nodePort,然后从页面上查看效果。

由于是serverless,所以具有弹性扩缩容,配置下即可
version: 1.0
provider:
  name: openfaas
  gateway: http://localhost:31112
functions:
  echo:
    lang: golang-middleware
    handler: ./echo
    image: zackzhangkai/openfaas-echo:latest
    labels: # 增加扩缩容的配置
      com.openfaas.scale.min: 1 # 最小只能是1
      com.openfaas.scale.max: 2 # 默认值是20
   com.openfaas.scale.zero: true # 是否缩到0,默认是false。社区版不支持缩到0
在实际生产环境中,需要配置环境变量、节点亲和性、给pod打label或是annotation等,都可以通过配置完成。
- yaml详细的配置,参考官方yaml https://docs.openfaas.com/reference/yaml/
- 扩缩容参考: https://docs.openfaas.com/architecture/autoscaling/
- 更多的案例sample 参考 https://github.com/openfaas/faas/tree/master/sample-functions
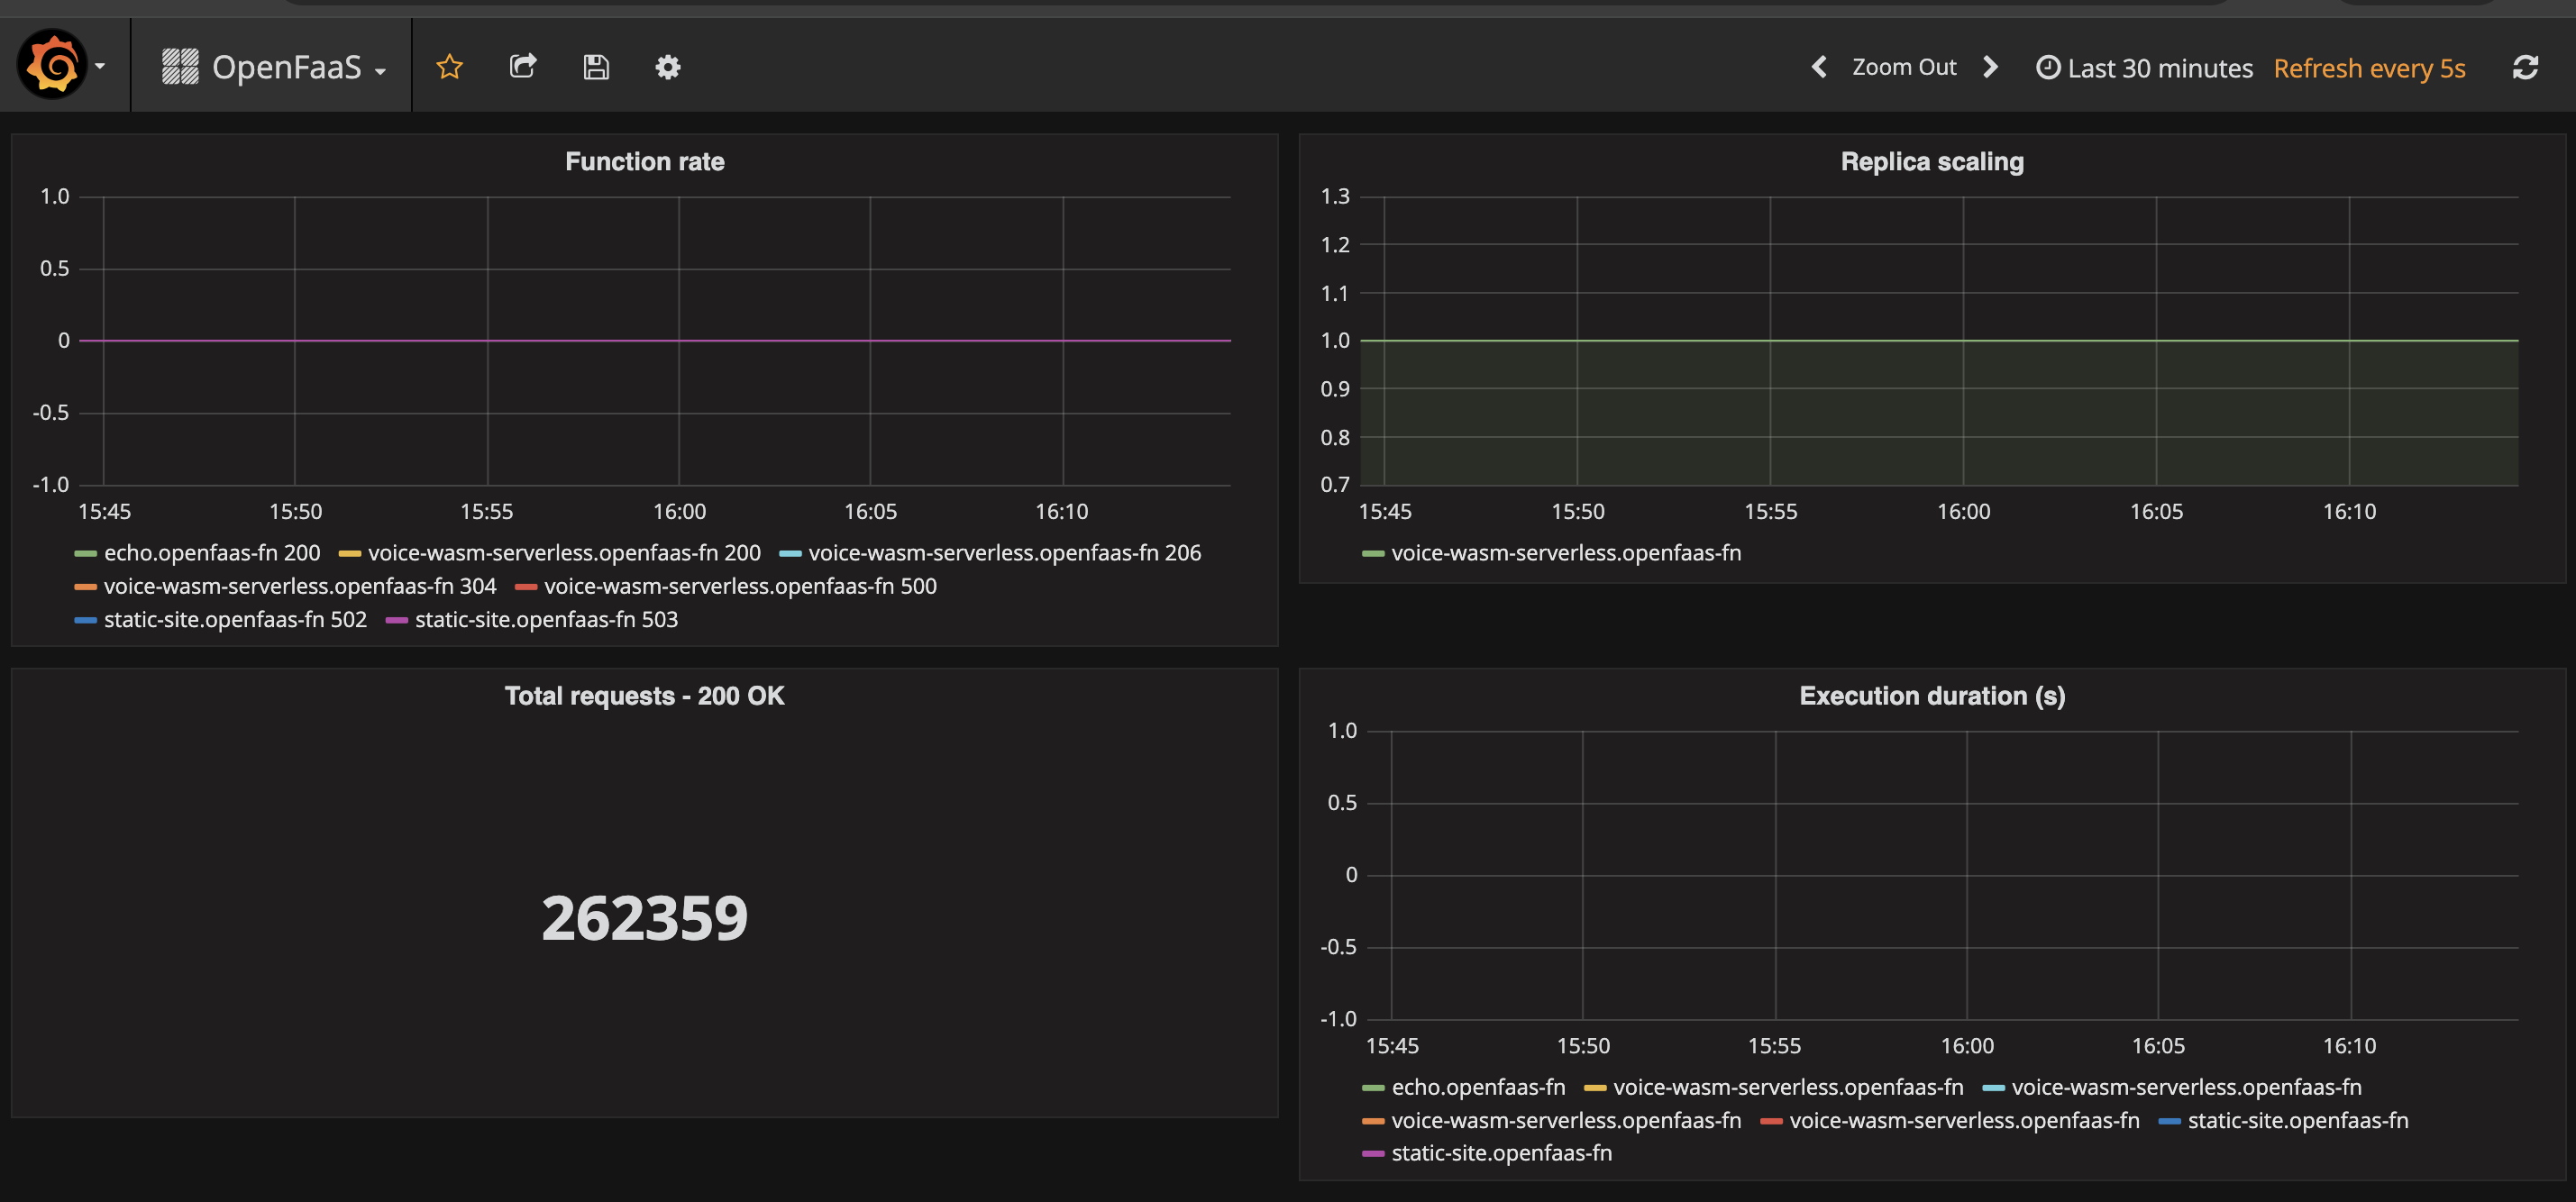
增加granfana大屏展示
通过上述步骤部署完openfaas后,会默认安装prometheus,此时将下列yaml apply到openfaas命名空间,即可以在页面上打开granfana:
# 用户名密码 admin/admin
apiVersion: apps/v1
kind: Deployment
metadata:
  name: grafana
  namespace: openfaas
spec:
  replicas: 1
  selector:
    matchLabels:
      app: grafana
  template:
    metadata:
      labels:
        app: grafana
    spec:
      containers:
      - name: grafana
        image: stefanprodan/faas-grafana:4.6.3
        ports:
        - containerPort: 3000
---
apiVersion: v1
kind: Service
metadata:
  name: grafana
  namespace: openfaas
spec:
  type: NodePort
  selector:
    app: grafana
  ports:
    - protocol: TCP
      port: 3000
      targetPort: 3000
      nodePort: 30000
查看所有的pod:
[root@VM-0-12-centos ~]# kubectl get po -A
NAMESPACE     NAME                                      READY   STATUS      RESTARTS      AGE
kube-system   coredns-6799fbcd5-fl84v                   1/1     Running     0             12d
kube-system   helm-install-traefik-crd-x2mlc            0/1     Completed   0             12d
kube-system   local-path-provisioner-84db5d44d9-4hdvz   1/1     Running     0             12d
kube-system   metrics-server-67c658944b-jr6qm           1/1     Running     0             12d
kube-system   helm-install-traefik-cwvj7                0/1     Completed   2             12d
kube-system   svclb-traefik-25c3b19a-tqf2d              2/2     Running     0             12d
kube-system   traefik-f4564c4f4-wkpxt                   1/1     Running     0             12d
openfaas      nats-5c48bc8b46-9vfg2                     1/1     Running     0             12d
openfaas      alertmanager-795bbdc56c-6m5sl             1/1     Running     0             12d
openfaas      gateway-67df8c4d4-zdd7t                   2/2     Running     1 (12d ago)   12d
openfaas      queue-worker-b9965cc56-t6p9d              1/1     Running     2 (12d ago)   12d
openfaas      prometheus-78d4c9f748-vstcb               1/1     Running     0             3d22h
openfaas      grafana-6c7949566-84pb6                   1/1     Running     0             3d22h
openfaas-fn   voice-wasm-serverless-7cdbd86dbc-vrrpq    1/1     Running     0             49m
页面上看到的效果:

